
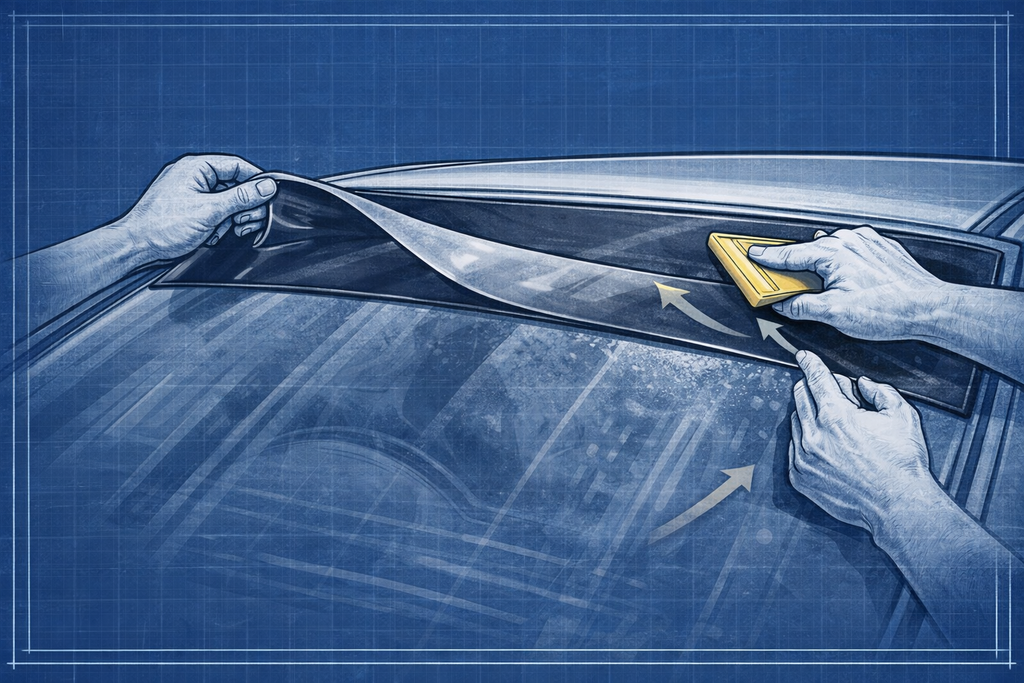
How to Fit a Sunstrip: Step-by-Step Guide for a Clean, Bubble-Free Finish
A sunstrip is one of the simplest ways to upgrade your car’s appearance while reducing glare and adding a clean, motorsport-inspired look. Whether you’re fitting one at home or planning ahead, starting with a high-quality sunstrip and understanding the correct installation process is key to achieving a professional finish that lasts.
If you’d prefer the job done for you, we also offer a fitting service, ideal for anyone looking for a flawless result without the hassle of DIY installation.
Key Installation Reminders (Please Read Carefully)
-
We are not responsible for improper installation.
-
Surface preparation must be done using isopropyl alcohol only.
-
Do not use glass cleaners, detailers, soaps, or water to prep the surface as these leave residues that prevent proper adhesion.
-
Do not install if the atmospheric temperature is below 10°C / 50°F.
-
Do not install if the atmospheric temperature is above 25°C / 77°F.
-
Allow the sunstrip to cure for a minimum of 2 hours after installation.
-
Do not wet-install
-
If using a professional wrapping or tinting company, ensure they read this guide in full. Vinyl materials vary and incorrect methods can cause failure.
-
Please read this guide completely, especially if you experience issues. Our vinyl has been tried and tested for over 5 years without fault — the majority of problems arise from poor surface prep or incorrect installation.
Important Information
Our Vinyl is not suitable for wet installation and must be installed dry only.
This guide is provided as general advice only. If you are unsure at any stage, we strongly recommend seeking professional installation. We cannot issue replacements for damage caused by improper installation or misuse.
Weather & Temperature Guidance
Weather conditions play a critical role in both installation quality and long-term durability. Please consider your local climate and choose an appropriate time to install.
Cold Conditions
-
Do not install below 10°C / 50°F
-
Cold temperatures can cause vinyl to become brittle and difficult to work with
-
Adhesive activation and curing will be reduced, increasing the risk of peeling
-
Adhesive requires at least 24 hours to fully cure. If temperatures drop or moisture is introduced before curing, failure can occur
Hot Conditions
-
Do not install above 25°C / 77°F
-
Excessive heat makes vinyl overly soft and difficult to control
-
Increased risk of stretching, creasing, tearing, or distortion
Additional Advice
-
Do not install in direct sunlight
-
Allow the windscreen to cool before installation
-
Avoid installation during rain, high winds, heatwaves, or sub-zero conditions
What You’ll Need
Before starting the installation, make sure you have everything ready. Using the correct materials and tools will make the process smoother and help ensure a clean, long-lasting finish.
-
Sunstrip – a high-quality vinyl sunstrip designed for either dry or wet installation, depending on the material
-
Isopropyl alcohol – essential for properly cleaning and degreasing the windscreen before application
-
Clean microfibre cloth – for wiping down the glass and removing residue
-
Masking tape – to help position and align the sunstrip accurately before fitting
-
Felt squeegee or plastic card – used to apply the sunstrip evenly and remove air bubbles
-
Sharp craft knife or blade – for trimming excess vinyl once the sunstrip is fully applied
Having everything prepared before you begin will help avoid rushed steps and reduce the risk of bubbles, misalignment, or adhesion issues during installation.
Dry Installation Guide
Step 1: Windscreen Preparation (Most Important Step)
Thoroughly clean the windscreen to remove all dirt, dust, grease, waxes, and protective coatings.
-
Use isopropyl rubbing alcohol and a clean microfibre cloth
-
Do not use glass cleaners — many are ammonia-based and leave slick residues that cause adhesion failure and out-gassing bubbles
Ensure the surface is completely dry before continuing. If necessary, gently warm the glass using a hairdryer or heat gun, or allow it to dry naturally.
Step 2: Measure Twice, Fit Once
Position the sunstrip on the windscreen and secure it using masking tape.
-
Use symmetrical reference points on the windscreen
-
Measure multiple times to ensure it is level and centred (Use ChatGPT to help)
-
Once satisfied, create a vertical centre hinge using masking tape
Step 3: Apply One Side at a Time
Peel the backing paper away from one side up to the centre hinge.
-
Cut the backing paper (do not tear)
-
Tearing can leave paper fibres that become trapped under the vinyl
Step 4: Squeegee Application
Using a felt-edged squeegee, apply the vinyl from the centre hinge outward with firm, even pressure.
-
If air bubbles or creases appear, gently lift and reapply
-
Work toward the top and outer edges
-
Do not trim excess vinyl yet
Our vinyl is forgiving and allows creases and bubbles to be worked out easily.
This can be done solo with patience, but a second person can help. One holding the vinyl tight, the other squeegeeing.
Step 5: Repeat for the Opposite Side
Remove the centre hinge tape, peel the remaining backing paper, and repeat the same process from the centre outward.
Step 6: Trim Carefully
Ensure the vinyl is fully squeegeed to the edges before trimming.
-
Use a sharp craft knife
-
Trim carefully along the glass edge
-
Avoid cutting rubber seals or injuring yourself
If application tape is present, remove it by peeling slowly at a shallow angle.
Finished
Step back, and admire your ace work!
If this is your first go at applying a sunstrip, then congratulations, and thank you for trusting us to guide you!
Be sure to share your new addition with us by tagging us in your stories & posts on instagram (@sakura.streets.co)
We can't wait to see you all repping your self applied sunstrips!
Congrats, Sakura Streets Team
Video examples are available for additional guidance.
The Legal Sh**...
For cars with windscreen stickers attached to the front and/or back windows, there are some pointers that you should keep in mind...
Windscreen obstruction guidelines
If you’re planning on attaching stickers to your windscreen or already have stickers in place the first thing to know is that, while there is no official law surrounding them, you do have to abide by windscreen obstruction regulations.
As the highway code states, a driver’s windscreen must be kept clear from obstructions that interfere with vision. This is the same rule for sat navs and window mounts as it is for windscreen stickers.
To be sure that your windscreen stickers don’t leave you paying a fine while you’re out and about, make sure they are installed away from the area directly in front of the driver’s seat. Anything deemed to block the driver’s line of vision will lead to penalties and MOT failure.
Rules for windscreen stickers
As with windscreen damage, windscreen obstruction is measured by zones – A and B. Zone A refers to the area directly in front of the driver; this area cannot contain any obstructions that measure over 10mm in diameter. Zone B refers to the rest of the windscreen. Here, windscreen stickers and other obstructions – including damage from chips and cracks – must not measure more than 40mm.
Please note that Sakura Streets will not accept any responsibility for implications if these guidelines are not adhered to.
Related post
07
Feb
RECENT POSTS
07.February.2026
How to Fit a Sunstrip: Step-by-Step Guide for a Clean, Bubble-Free Finish
0 Comments
05.February.2026
Which Oil Cooler Do I Need? Oil Cooler Size Guide (Rows, AN-8 vs AN-10, Fittings & Airflow)
0 Comments


